 Lex The Husky
How to Buy $LEX
New to crypto? This guide takes you from your first purchase to swapping for $LEX on this site, one step at a time. Set aside about half an hour, and expect the identity check at the exchange to be the slowest part.
Tip: read this guide on a computer while you follow the steps on your phone. It's easier to keep an overview that way.
Get the Ult wallet
To use a website like this one, you need your own wallet. Ult (the new name for Crypto.com Onchain Wallet) is made by the Cronos team and works on Cronos.
- Install Ult from the official App Store or Google Play page. Check the developer name and don't follow links from strangers.
- Create your wallet. Newer Ult accounts sign in with Google, Apple, or a passkey and have no seed phrase. If your wallet uses a seed phrase, write it on paper and never share it with anyone, ever.
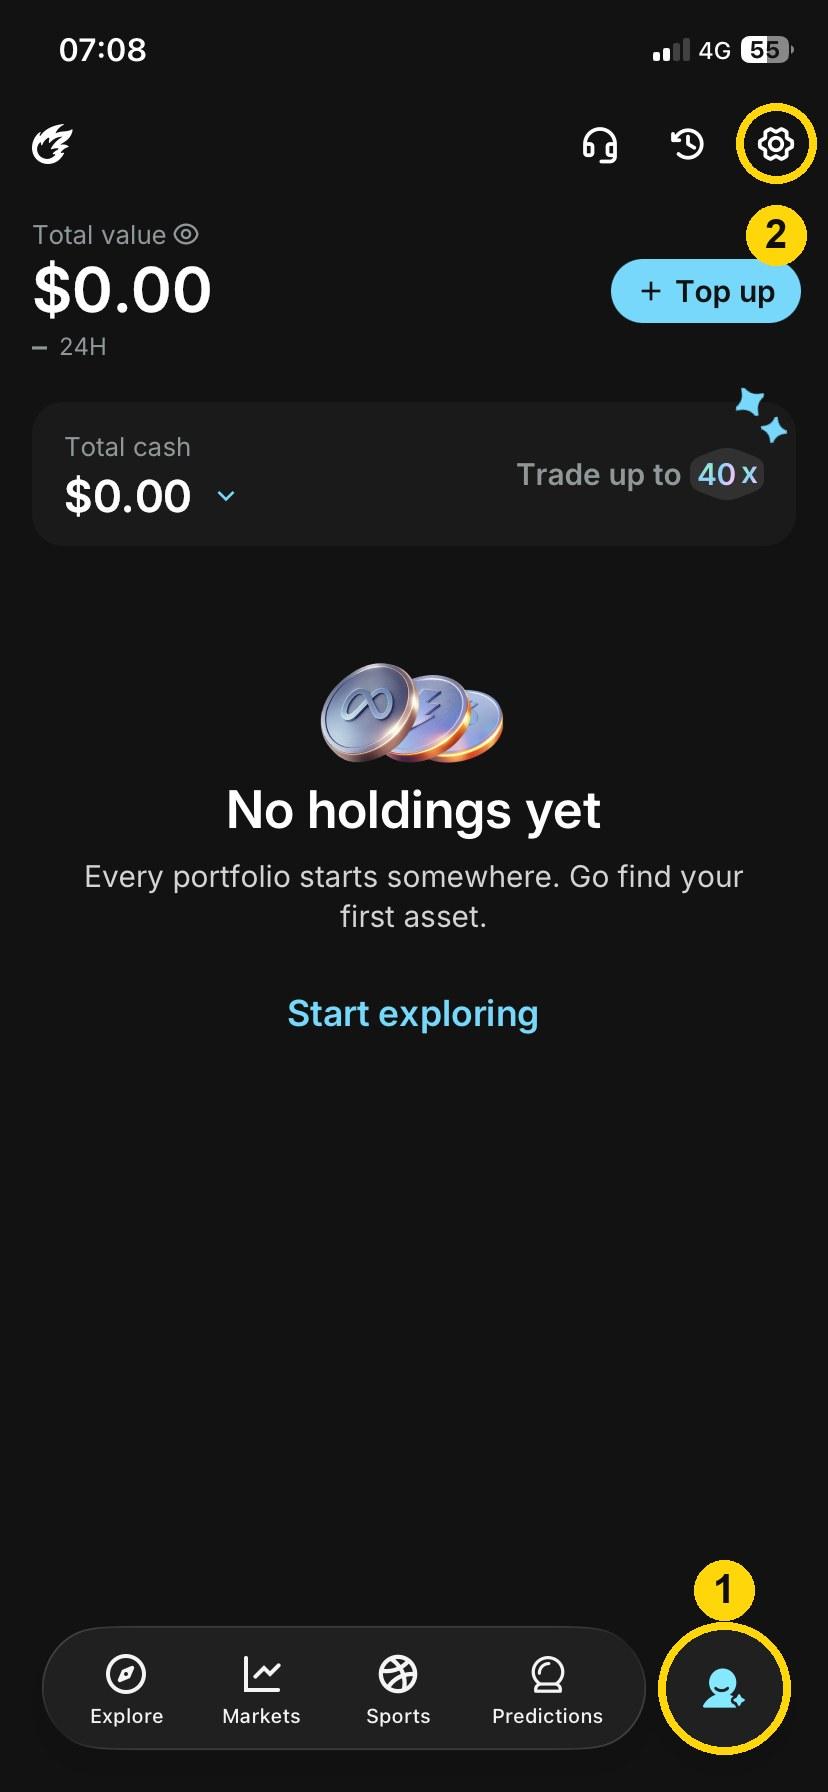
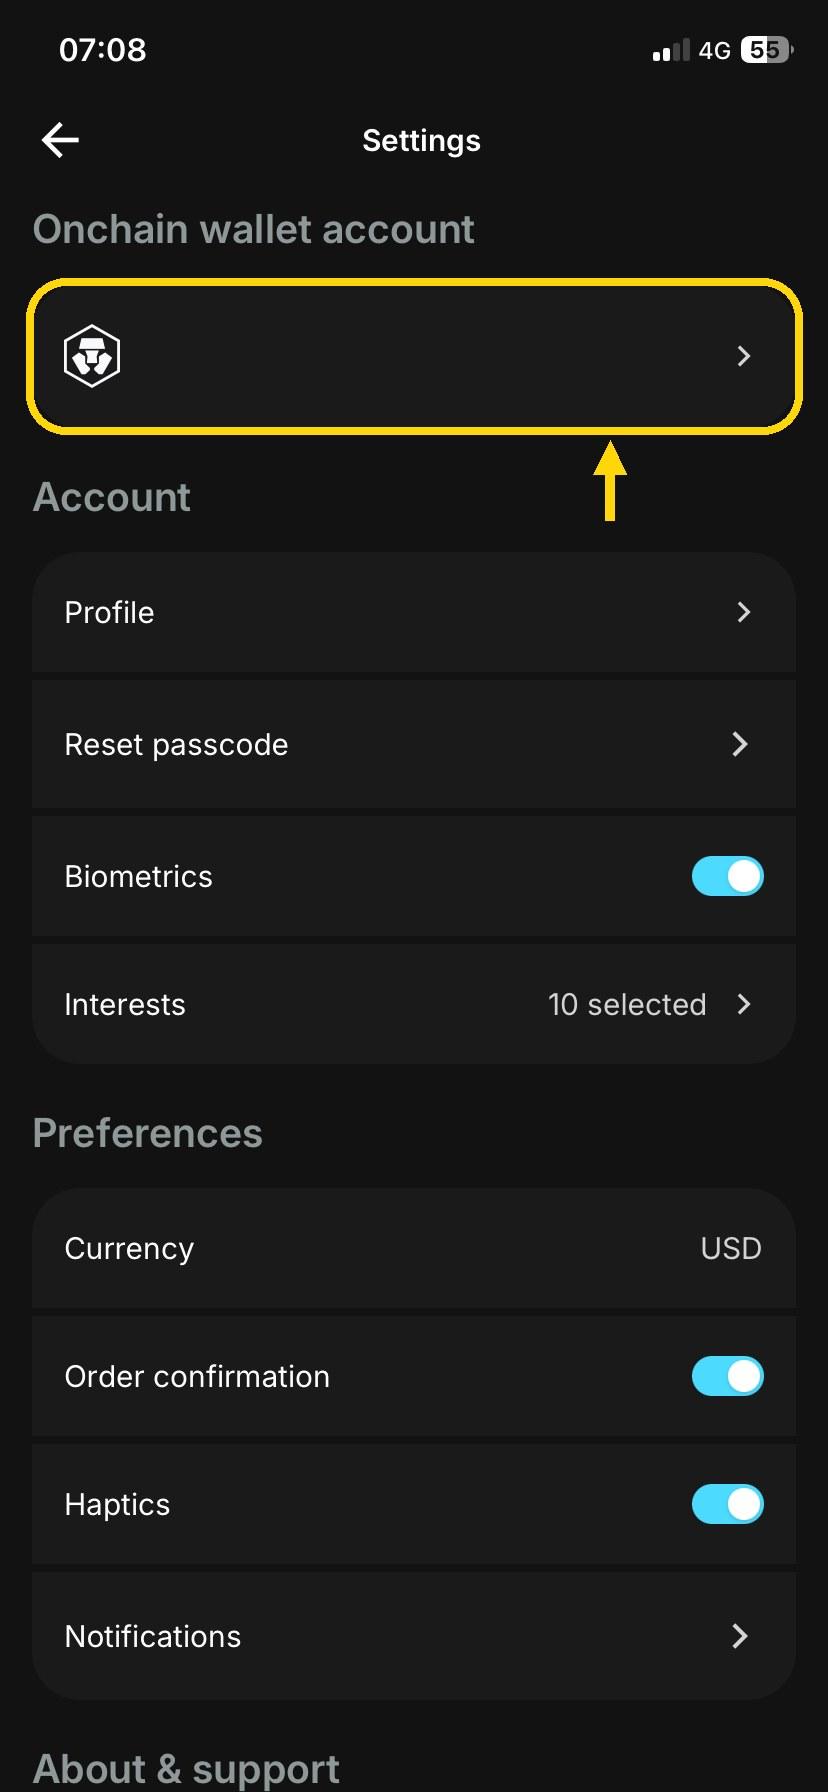
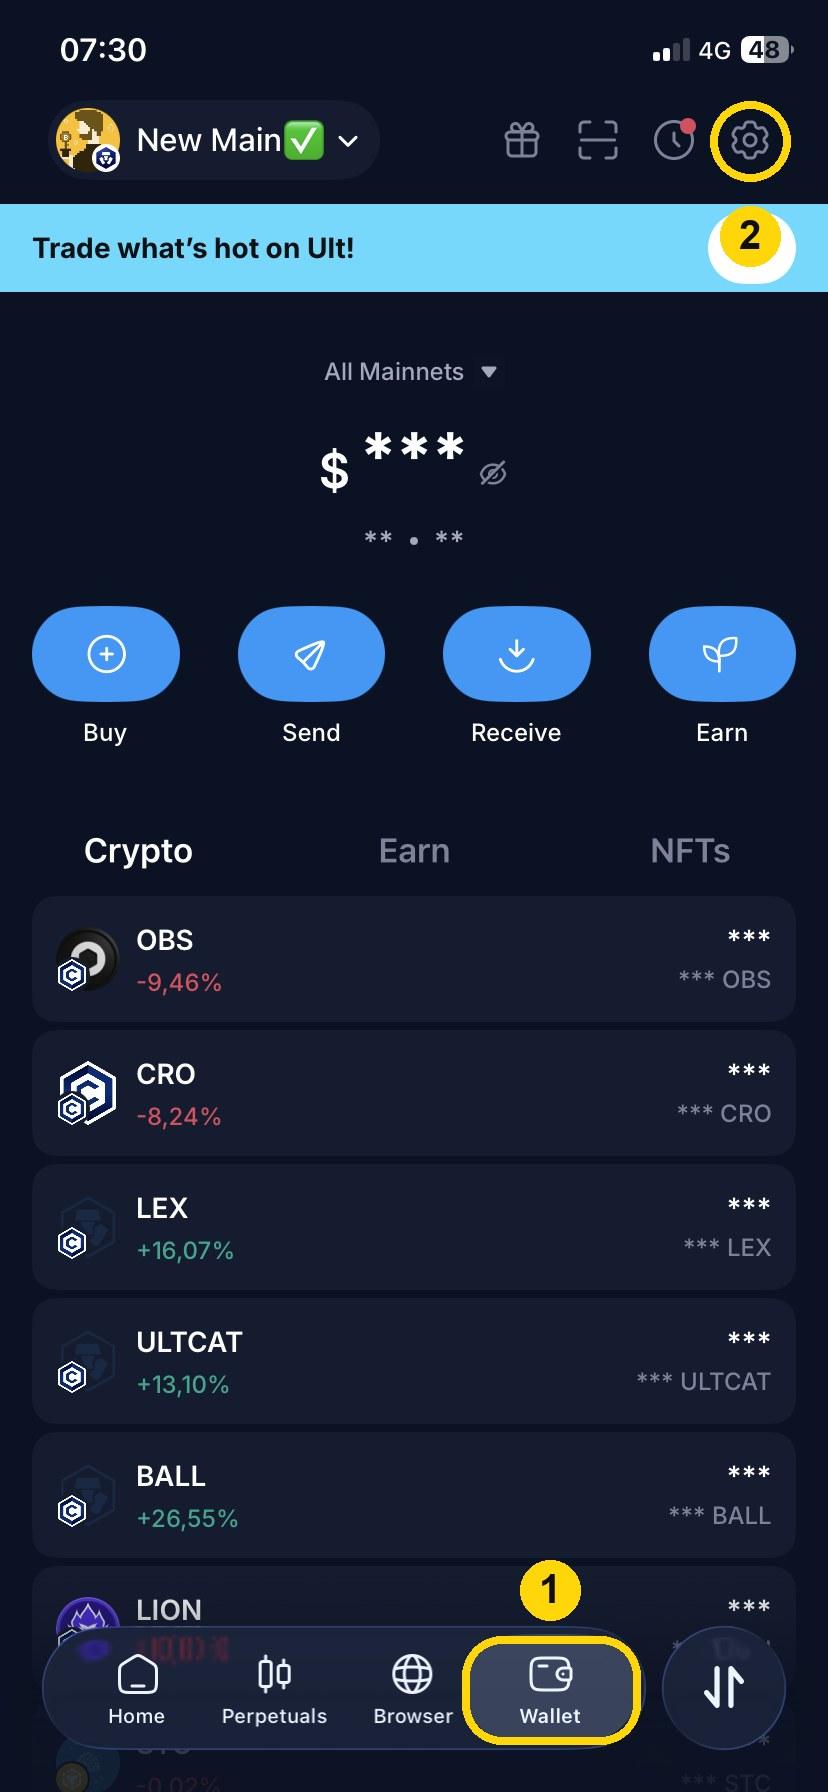
- The app has two sides: Ult (trading) and Onchain Wallet (your own wallet with the built-in browser). For this guide you need Onchain Wallet. To switch, tap your profile icon at the bottom right, then the settings icon at the top right, then “Onchain wallet account”.
- Next you need some CRO in the wallet. Choose your route with the tabs above: option A (buy in the wallet) or option B (buy on Crypto.com and send it).
Option A: buy CRO directly in your wallet (simplest)
You can buy CRO with a card, Apple Pay, or a bank account right inside Onchain Wallet. The CRO lands straight in your wallet, so you don't need to send anything.
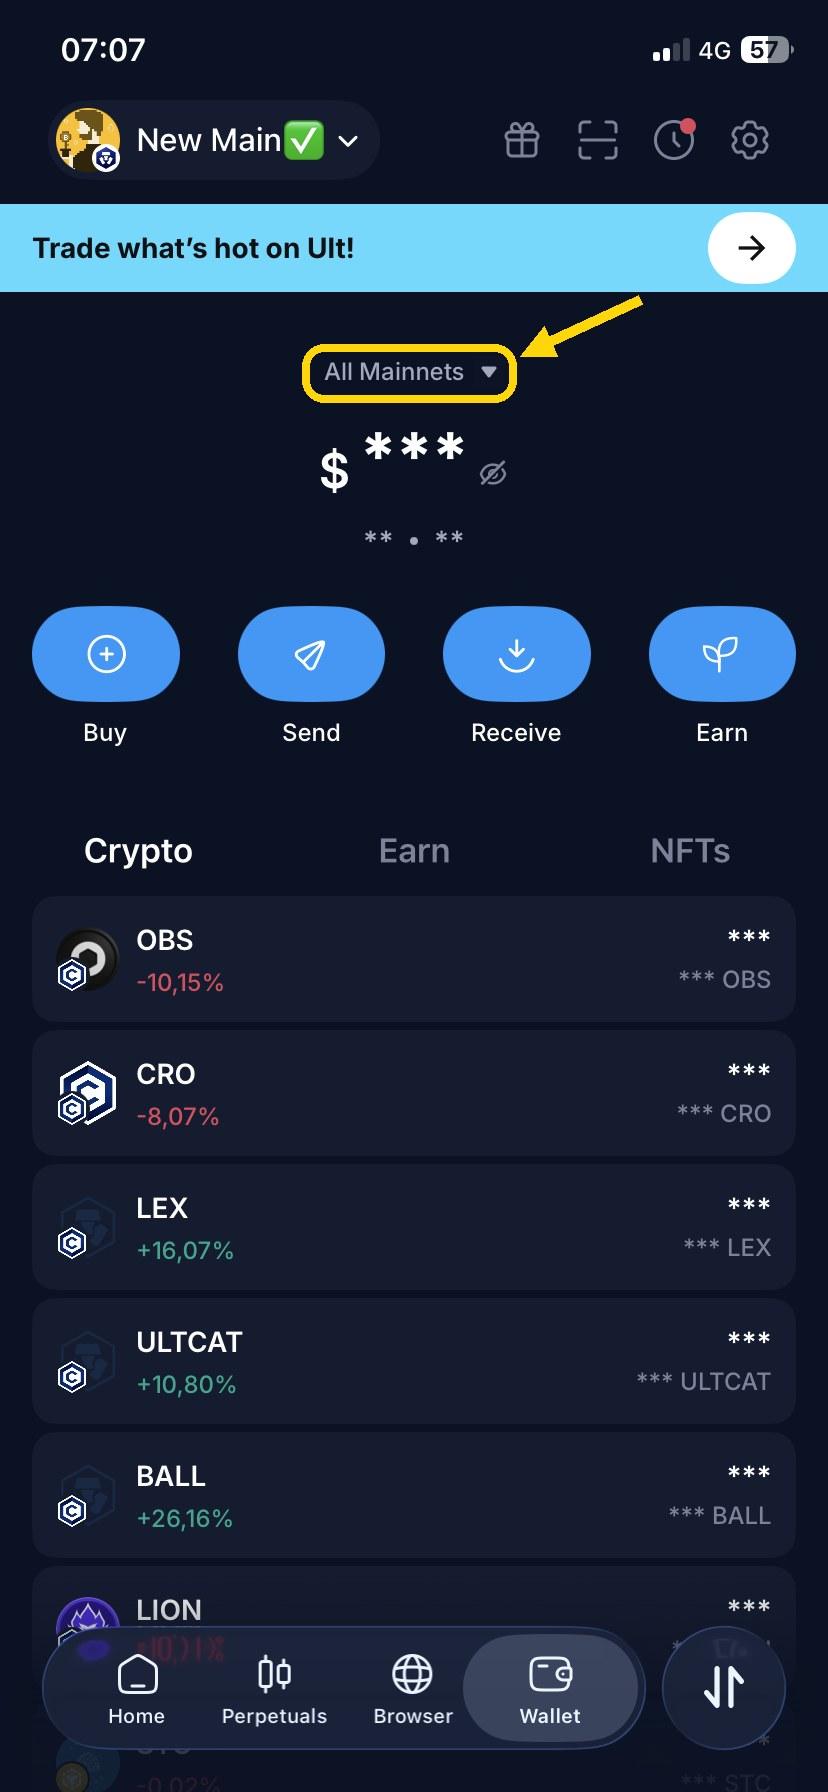
- In Onchain Wallet, tap Wallet in the bottom bar. At the top it says “All Mainnets”. Tap it.
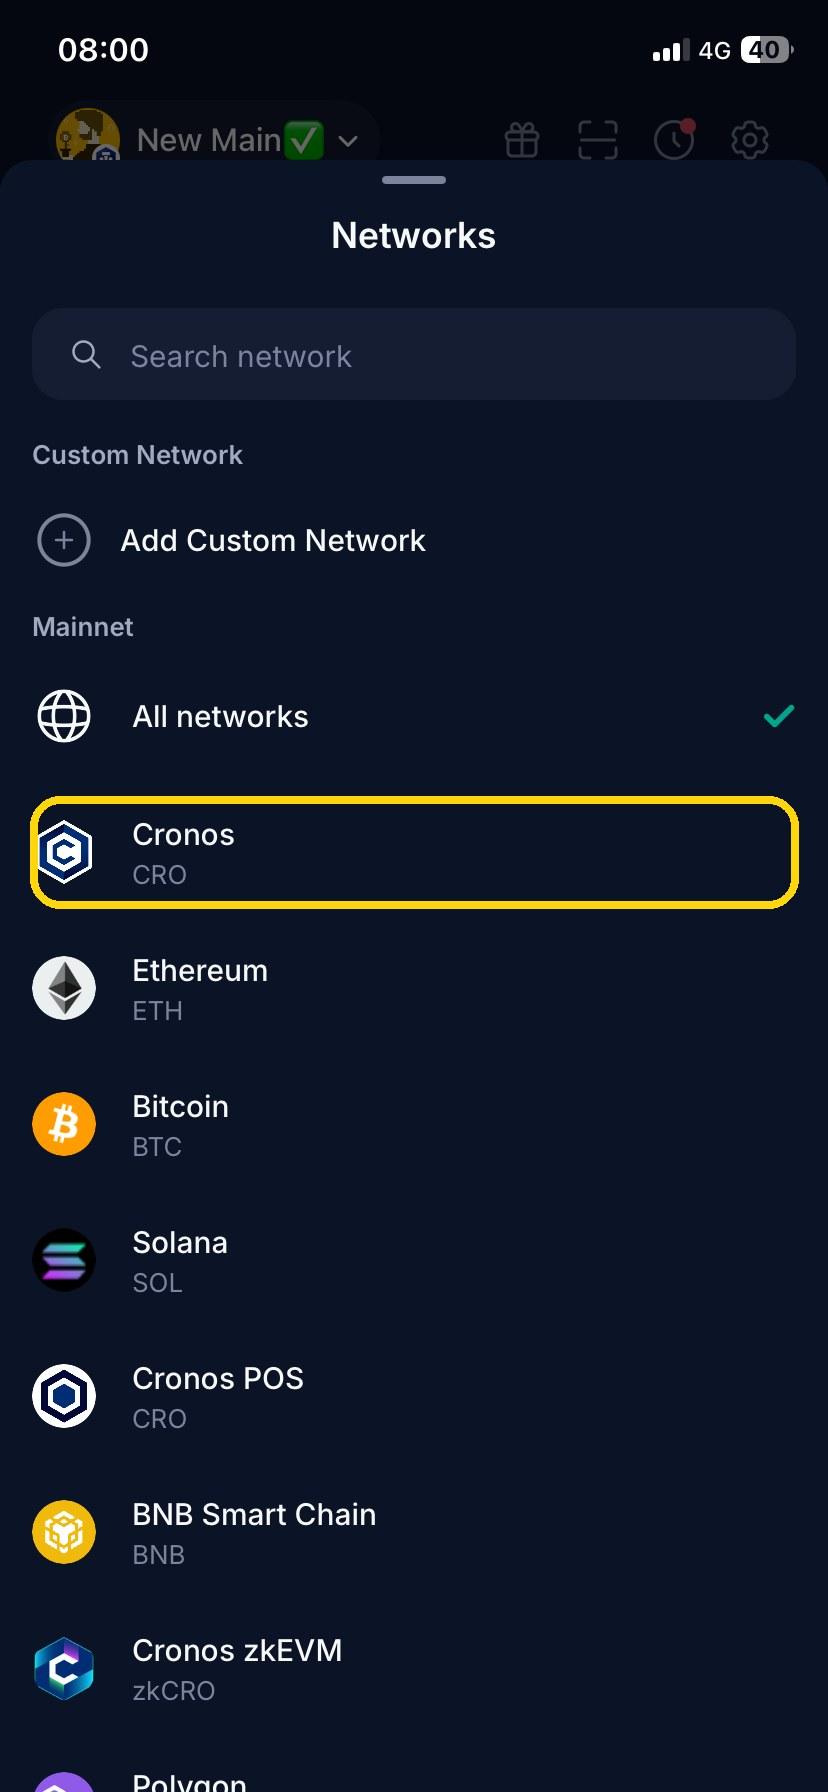
- In the Networks list, choose Cronos.
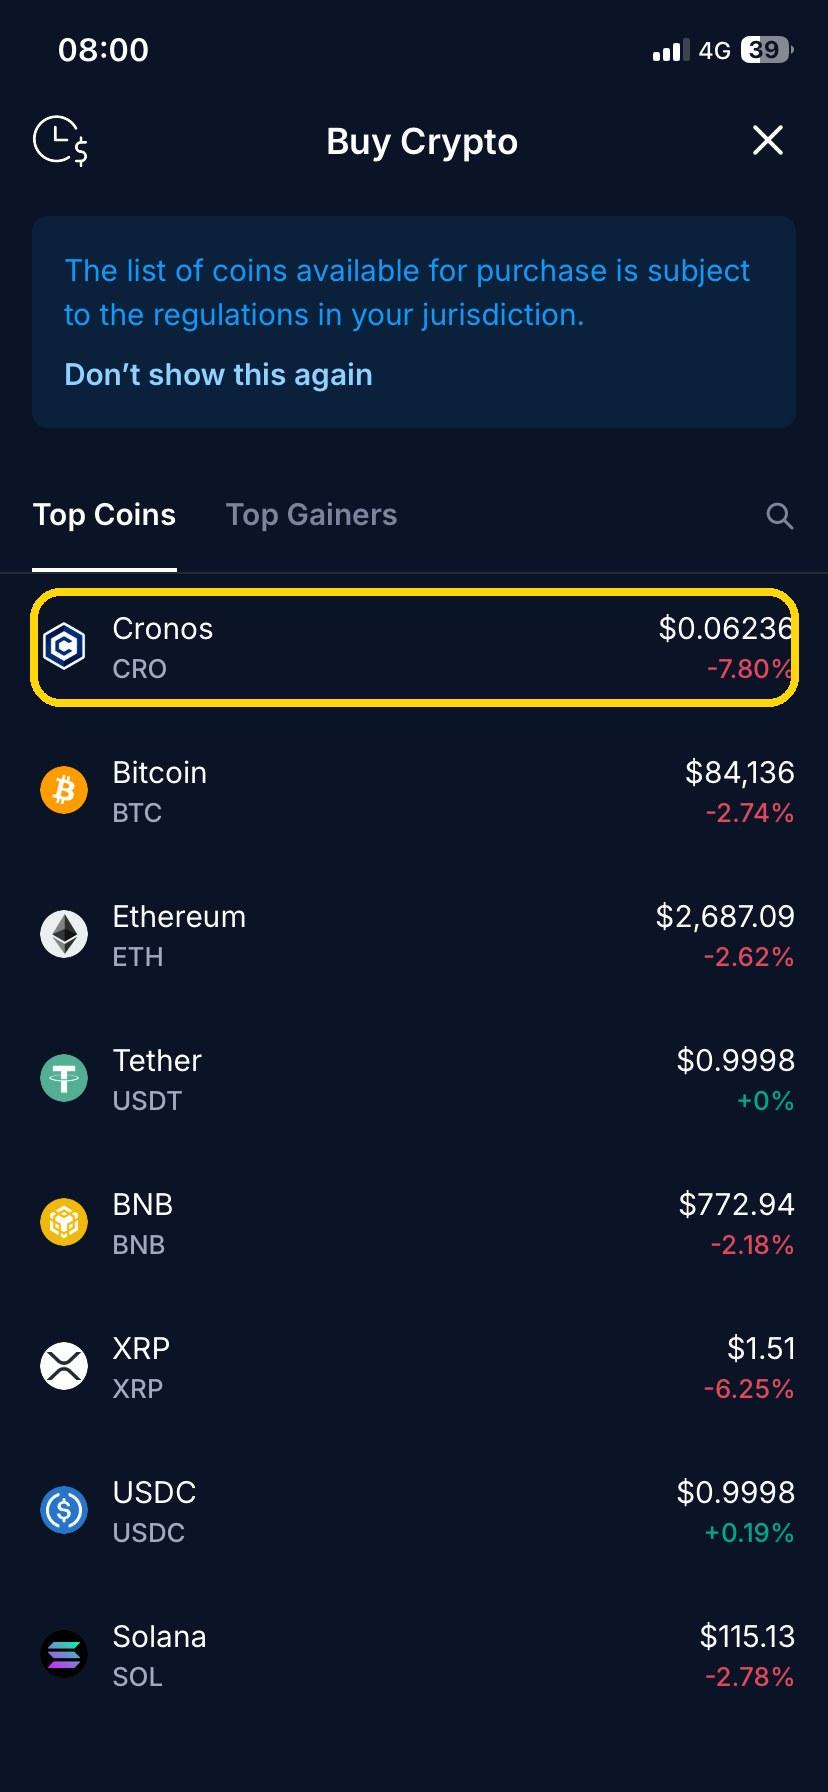
- Tap Buy, then choose Cronos (CRO) in the Buy Crypto list.
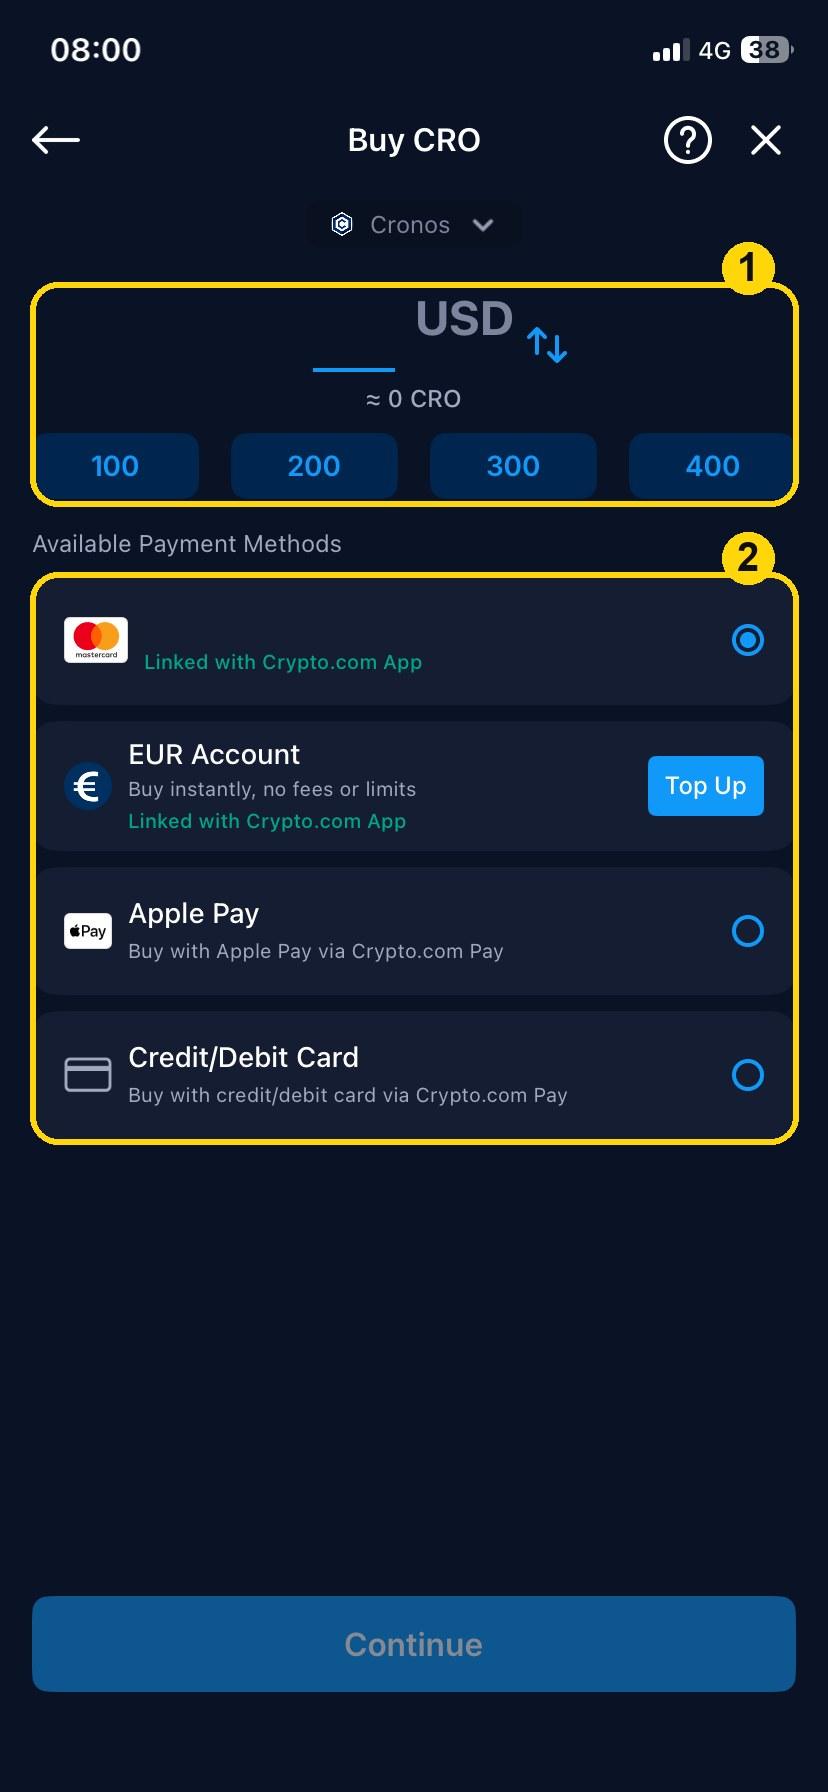
- Enter an amount, choose how you want to pay (card, Apple Pay, or a linked account), and tap Continue. Follow the steps on screen. Payment options marked “Linked with Crypto.com App” only appear if you've connected your wallet to your Crypto.com App account. If you haven't, you won't see them, and that's normal. You'll then see the other options, such as Apple Pay or Credit/Debit Card (“via Crypto.com Pay”).
- What's possible and which payment methods you get depends on your country. The app may ask you to verify your identity first.
Swap CRO for $LEX on this website
Once the CRO is in your wallet, you're ready to buy $LEX.
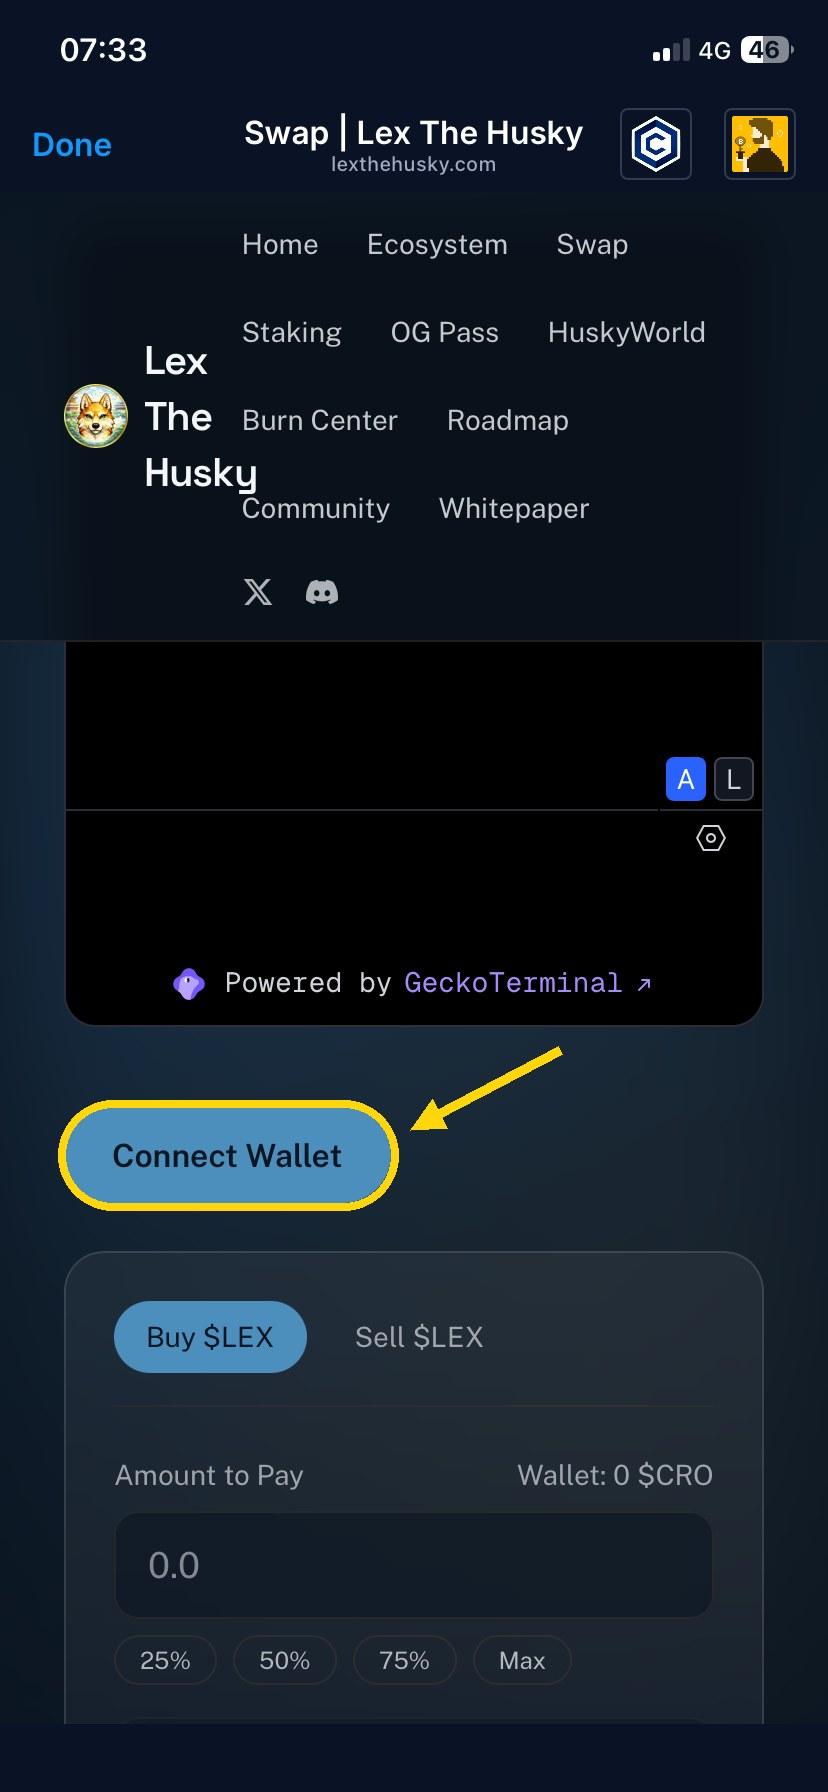
- In Onchain Wallet, tap Browser in the bottom bar and go to lexthehusky.com/swap.
- Tap Connect Wallet and approve the connection. Make sure the network is Cronos.
- Choose Buy $LEX, enter how much CRO to spend, and press the buy button.
- Your wallet will ask you to confirm two transactions: the 5% ecosystem-support fee, then the swap itself. Confirm both and wait for each one to finish. Good to know: you can also swap on EmberCRO, Obsidian Finance, or WolfSwap without this site's 5% fee. Once you feel comfortable, you can look into that at your own pace through the tutorials in those platforms' info channels.
- If $LEX doesn't show up in your wallet, add it by hand: see step 4.
Add $LEX to your wallet (only if it doesn't show up)
After your swap, $LEX usually appears in your wallet by itself. If it doesn't, add it by hand. It takes a minute.
- In Onchain Wallet, tap Wallet in the bottom bar, then tap the settings icon at the top right.
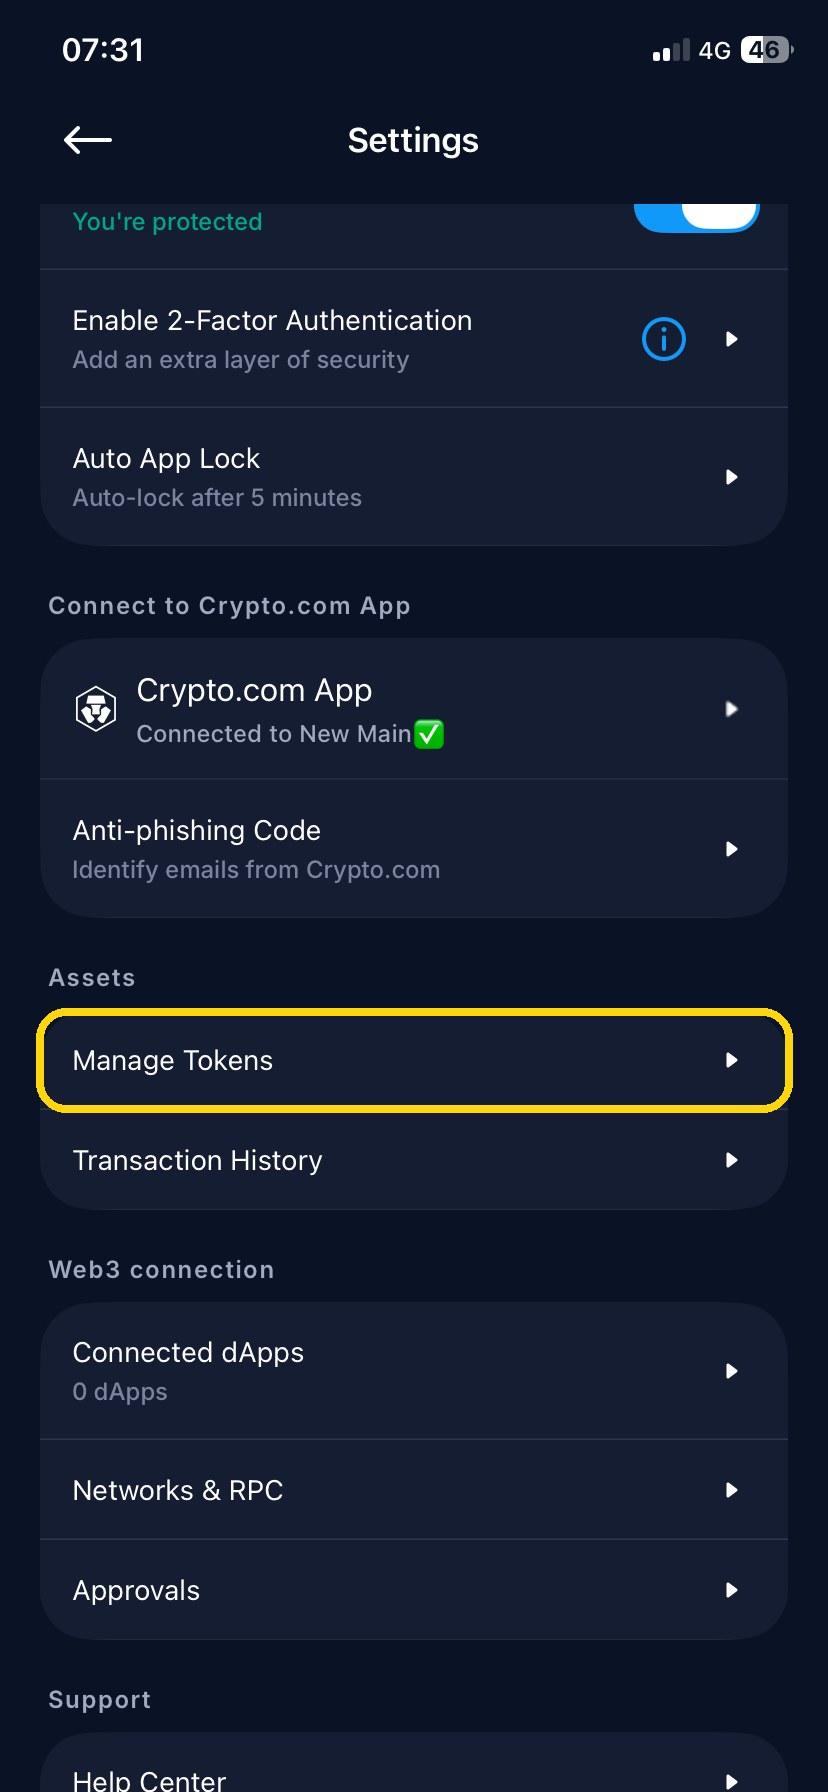
- Scroll down to Assets and tap Manage Tokens.
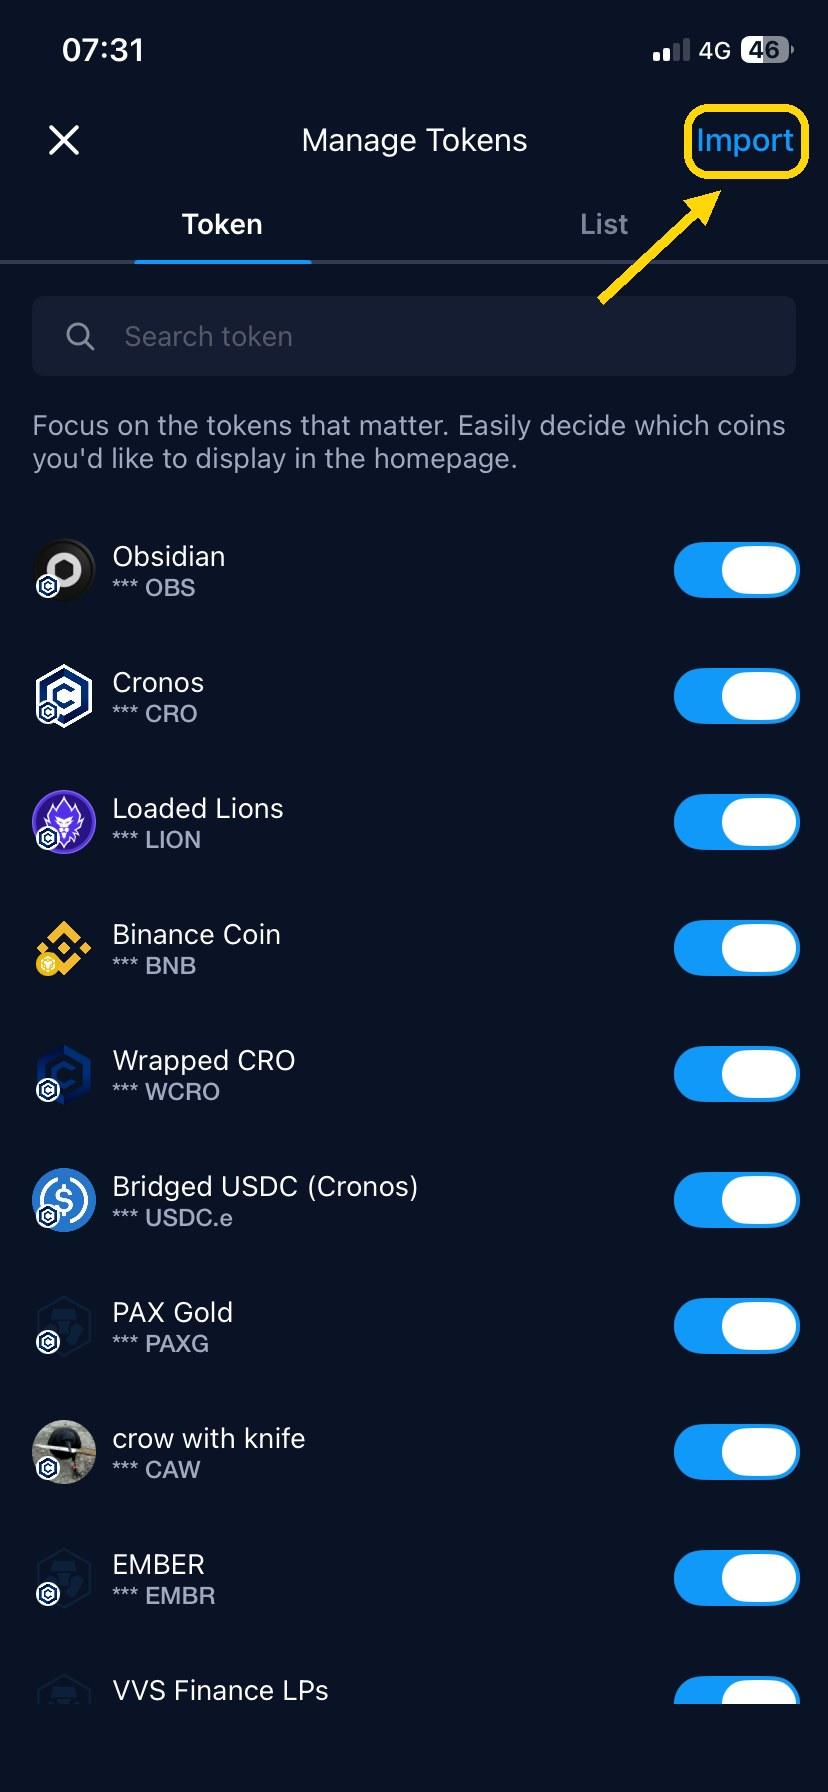
- Tap Import at the top right.
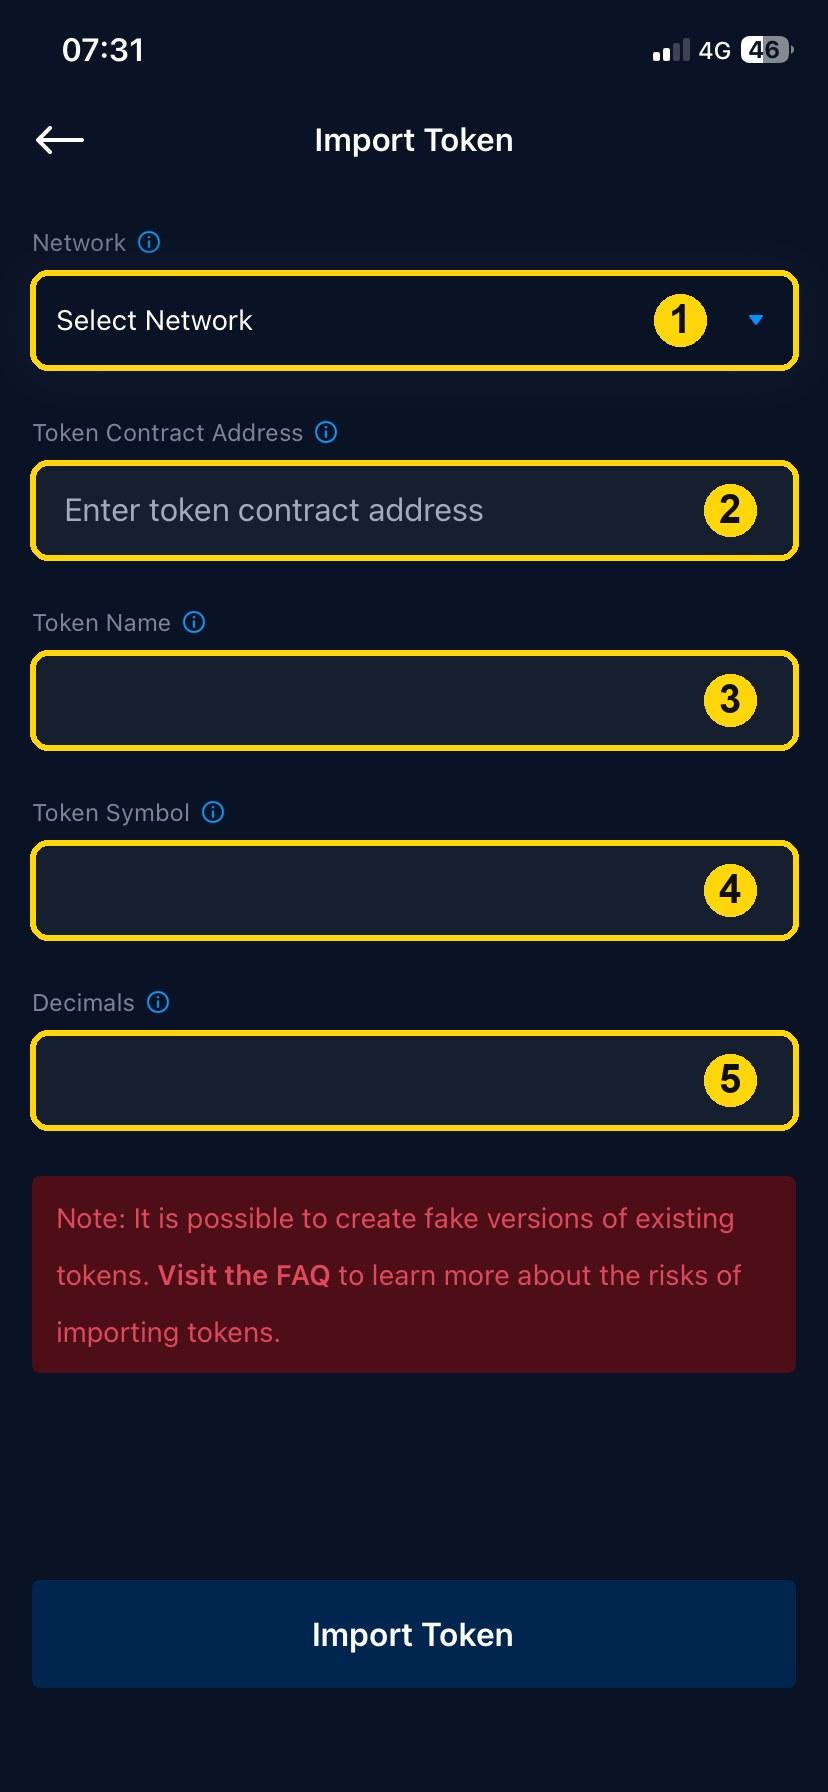
- Fill in the form: (1) Network: Cronos. (2) Token Contract Address: the address at the bottom of this page. (3) Token Name: Lex The Husky. (4) Token Symbol: LEX. (5) Decimals: 18.
- Compare the address you entered with the one on this page, then tap Import Token. The app warns that fake copies of tokens exist. That's why you copy the address from this page and nowhere else.
Stay safe
- Nobody from Lex The Husky will ever ask for your seed phrase, passkey, or password. Anyone who does is a scammer.
- Ignore private messages that offer help. Ask questions in the official Discord or Telegram channels instead.
- Always check the contract address below before you swap or add the token.
- Only spend what you can afford to lose. Crypto prices go up and down, and this is not financial advice.
Apps and screens change over time, so names and menus may look slightly different from what's described here. Swapping on this site adds an optional 5% ecosystem-support fee. Swapping directly on EmberCRO, Obsidian Finance, or WolfSwap skips it.